Remove “volunteers”
Take out plants that sprout from seeds in ripe fruit left in the garden last year. This is especially common with small-fruited types (cherry and grape tomatoes) because dropped fruit is easy to miss.
Because some pathogens can survive in seed, these volunteer plants can be a source of certain bacterial and fungal pathogens. Also, volunteer plants are likely to yield fruit that resembles be the parent plant only if it was an open pollinated (OP) variety. Most tomato varieties are hybrids and may bear fruit totally different from their parents.
Rotate crops
Don’t grow tomatoes in the same location every year. Several pathogens – notably those causing anthracnose, Septoria leaf spot, early blight, and bacterial diseases – can survive in tomato plant parts left in the garden. As a minimum I recommend two seasons of growing other crops between tomato plantings.
In my own long, narrow garden (about 12 feet by 75 feet), I plant several rows of tomatoes that take up at least a third of the best space (I don’t use the end shaded by a tree starting mid-afternoon). So the best I can do is a one-year rotation with tomatoes in the same garden section every other year.
But with the shorter-than-recommended rotation, I use other management practices like mulching (see below) to limit diseases. Most importantly, I remove all the tomato debris I can at season end. The reason for rotation is to allow time for decomposition of debris harboring a pathogen that is incorporated into soil, which is what farmers do at season end because physically removing all their plants is rarely feasible for them.
Of the diseases caused by pathogens that can survive in soil, I have had anthracnose, Septoria leaf spot, and bacterial canker. But I don’t see them every year and typically they are only a minor problem when they do occur, suggesting that my disease-prevention management is working.
If you also grow potatoes, use certified, disease-free seed potatoe tubers. The pathogen that causes late blight (responsible for the Irish potato famine) can survive in potato tubers. And it is the most destructive tomato disease, too. There is a lower tolerance for diseased tubers in certified seed potatoes than in table-stock potatoes marketed for human consumption.
Grow tomatoes in full sunlight
They’ll be spindly and not produce well unless you provide them with at least 6 to 8 hours of direct sun daily.
Avoid walnut trees
Their roots produce a toxin that stunts sensitive plants such as tomatoes if grown in their root zone.
Provide plenty of space
2 feet between plants in a row and 5 feet between rows is ideal.
Minimize soil disturbance
Instead of rototilling your entire garden, simply dig a hole for each transplant to minimally disturb the soil. This helps maintain soil structure and health and minimizes germination of weed seeds. Place the plant such that all lower stem tissue without leaves is below ground. Roots will develop on this tissue.
Provide adequate fertility
I start when seedlings are still in their pots at the 1 to 2 leaf stage, periodically providing some soluble fertilizer when I water. (Follow directions on the package.) When I transplant, I first put home-made compost (yard and kitchen food waste) in the hole, add controlled release fertilizer (so they are fed over their long growing period), then mix into the soil before setting the plant in the hole. Tomatoes grow like crazy with adequate fertilizer. But be careful not to overdo it.
Cover soil with mulch
I mulch primarily to control weeds. But mulching also conserves soil moisture and creates a barrier preventing pathogens in soil from being splashed onto leaves. I use organic mulches, rather than plastic. As a result, my soil has a lot of earthworm activity, is high in organic matter, and is friable (easy to work).
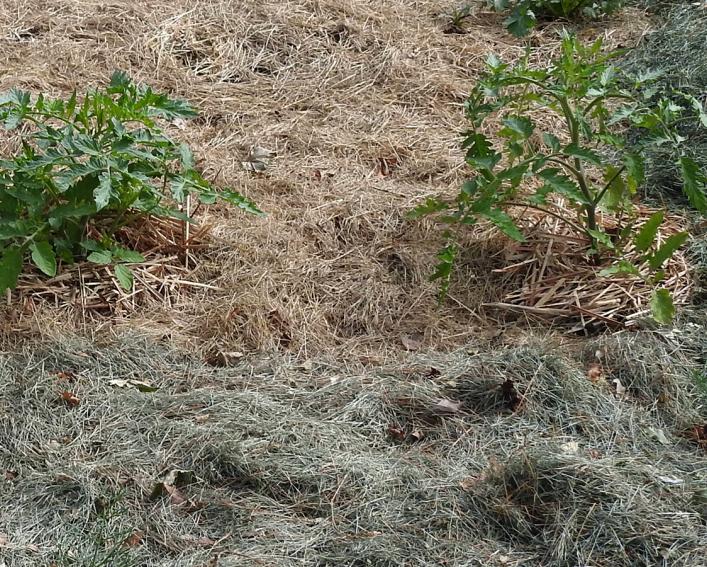
I put straw mulch in a thick layer around the base of plants. Each spring I use my chipper-shredder-mulcher to make straw mulch from dead ornamental grass and other ornamental plant debris from my landscape. But you should be able to purchase bales of straw at local garden centers.
Walkways and areas between plants I cover with lawn clippings from mowing. Dried clippings I put closest to plants; fresh clippings go in the walkways. Before putting down fresh clippings, I push old dried ones closer to plants. Clippings break down over the summer, so I add more after each mowing. Don’t use lawn clippings if herbicide was applied to the lawn.
Trellis plants
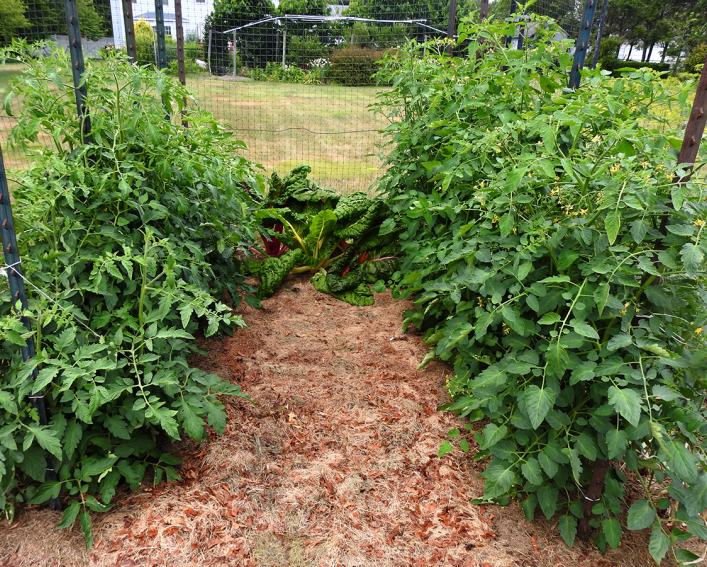
I use the basket weave trellising method that farmers routinely use with a stake between each plant. I use 9-foot metal stakes to accommodate tall-growing indeterminant plants. My husband is tall enough that he can help drive them into 1 to 2 feet into the ground and assist with the highest trellising late in the season. I also grow one row of determinant plum tomatoes which do fine with shorter stakes.
I used to use wooden stakes like farmers do. But they can break from the weight of the plants, especially, during a storm. Before that I tried tomato cages. But they are not big enough for indeterminant plants, and can fall over.
I haven’t had luck growing tomatoes in large pots. They grow so much better in soil, perhaps because their roots have ample space and the soil drains well.
You can purchase tomato trellising twine online. I run a line every about 8 inches as plants grow. I cut a length of twine for each row. I tie a piece on the end stake, go around the outside of all the stems of the plant between the stakes redirecting leaves so they extend outwards, then I wrap the twine around the next stake and continue down the row to the last stake. After wrapping the twine around it, I walk around to do the opposite side of the tomato row. The “in and out” pattern formed by the twine is why they call this practice the basket weave.
The first line is fairly tight. Lines further up are loose enough to be able to get hands in to pick fruit that form in the canopy while keeping stems upright. With some varieties like most cherry tomatoes that produce a lot of branches, it is worthwhile to remove some to keep the plant manageable. Clip off stems that grow above the last line at the top of the stakes.
Keep foliage dry
Most pathogens need wet leaves to infect plants. So overhead watering can promote diseases. Water plants at the base so that you keep leaves dry and try to avoid splashing soil.
Wet foliage can harbor pathogens, bacteria in particular. If you harvest fruit, work on plants or even walk through your tomatoes when the leaves are covered with dew, rain, or irrigation water, you can spread disease.
I water with a hose by hand providing ample water for the entire root system. Be careful not to over-water if your soil doesn’t drain well.
Water based on need
Routinely check soil moisture. Plants’ needs change a lot with conditions (especially temperature), their size, and how actively they are growing.
Be mindful of other factors that can affect water need. One end of my garden dries faster perhaps because roots of nearby trees extend into that section of the garden. Blossom end rot of the fruit is an indication of inadequate or inconsistent water supply.
Know your enemy
Learn about tomato diseases. Know the symptoms of those that could occur and the management practices for those that you’ve had problems with in the past. My vegetable disease photo gallery for more information as well as images for most diseases and disorders occurring in the Northeast.
Then check your plants routinely. Look for disease symptoms and insect pests. Removing affected leaves when first seen might be helpful, but once seen spread may have already occurred.
If you use fungicides to manage diseases, start as soon as you see symptoms. Preventive use is warranted for diseases that occur routinely. In contrast with human medicines, fungicides do not have curative activity. Read the label thoroughly so you know how to use them safely.
Harvest fruit as soon as it’s ripe
Remove any fruit that rots. Some pathogens, notably the one causing anthracnose, can survive in fruit. Also, the seed in those fruit when they drop could germinate the following year. When I harvest, I have a bucket for any rotten fruit I see – no tomato left behind!
Remove plant debris
As I mentioned before, several important pathogens can survive in plant debris. So at season’s end, I remove and compost almost all of the plant debris from my garden and landscape. But I do not compost the tomato plants. Those go in the yard waste bin for pick up for the municipal composting facility.